GUIDE
AT&T: About This Email Service Provider
Many people consider AT&T as a difficult email service provider to work with, they are in fact easy to navigate once you understand how the system works. The platform has multiple features designed to facilitate email deliverability and tracking how your subscribers engage and interact with your emails.
What Is AT&T?
AT&T is a tech company with interests in phone technology and email services. As an email service provider, the company caters to both business and residential subscribers. It allows them to keep in touch with their subscribers or friends through its efficient email delivery service. If you subscribe to the residential service, the email service provider will offer you 21 different emails accounts. ATT.net is the information service section of AT&T. Its operations cover email service and other services.
How Does AT&T Email Service Work?
Unlike Gmail, Yahoo, and Hotmail that provide free email services, AT&T limits its operations to its Internet subscribers only. Once you sign up on the platform and have a valid email account, you can send promotional messages to your subscribers.
How To Create An AT&T Email Account
Before you can enjoy their services, you need to create a personal AT&T account first. The login details you generate during the account creation phase will be useful in creating an att.net account. Setting up an AT&T email account is pretty simple. You can create an account within a couple of minutes by following the step-by-step guide below:
- Log into att.com with the login details you received when you created your AT&T internet account.
- Check the MyAT&T tab and select “Internet.”
- Scroll down until you see the E-mail accounts section. When you opened your personal account, you created your email address. That’s your primary email address. If you want to create more addresses, select “Create/Manage Sub-Account.”
- Click “Add a Sub-Account”
- Click “Accept” to agree to AT&T’s terms and conditions.
- Check the “Member ID” field and enter the new email address.
- To create a password for the email address, enter a new password.
- Check the “Confirm password” field and reenter the password for confirmation. If the two passwords you entered are a match, you can proceed to the next stage. Otherwise, rewrite the second password until it matches the first one.
- Enter the required information such as your name, address, and other personal information.
- Choose an offline security question and answer it.
- For online security question, select two and answer them.
- Click “Save” when you are done.
After successfully creating your account, you become eligible to use the email service. With the login details you created when you opened the AT&T account, you are half-way through the AT&T email service. Follow the steps below to use the email service:
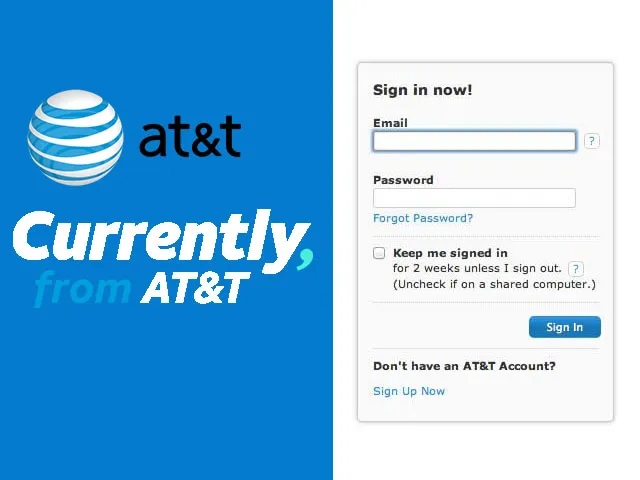
- Visit www.att.net.
- Enter your AT&T login details.
- Choose “Sign in” and off you go.
That is how easy it is to sign in to this service.
How To Set Up An Att.net Account With IMAP/SMTP
Sometimes, you may need a desktop email program to have access to your att.net email account. You can’t have that access if you don’t set up an att.net account for such purpose. You need SMTP (Simple Mail Transfer Protocol) and IMAP (Internet Message Access Protocol) settings to set up the account. Through IMAP, Att.net provides you with a platform that allows you to connect to your email addresses from a personal computer or a mobile device. The settings for the connection are below:
- AT&T (att.net) IMAP Server: imap.mail.yahoo.com
- IMAP username: your email address
- IMAP password: your att.net password
- IMAP port: 993
- IMAP security: SSL/TLS
For SMTP, the settings are:
- AT&T SMTP Server: smtp.mail.yahoo.com
- SMTP security: SSL/TLS
- SMTP port: 465
- SMTP username: Your email address
- SMTP password: your att.net password.
The opportunity to connect to your email addresses through a wide range of devices removes the stress of restriction to a single device. That makes it easy to receive and send email messages at your convenience.
AT&T Troubleshooting Support
A common challenge among email marketers is poor deliverability. There is usually a constant battle to boost the percentage of emails that land right in the inboxes of customers. If you are experiencing poor delivery rate using this service, there are things you can do to increase your deliverability. The troubleshooting support and tips here will help you identify the problem and fix it promptly:
Yahoo! has a complaint feedback loop. Make sure that the provider adds your domain to the loop. This allows you to get useful feedback.
- Check whether your IP address is on the blacklist. Symantec and Spamhaus are two blacklists that Yahoo! uses. Check both of them for your IP address. If you find it on either of the two, identify the issue that led to the blacklisting and fix it. AT&T has a blocklist for blocking emails from unknown sources. You can also check whether your blocking emanated from the company itself. A check of your SMTP logs will give you an idea about that.
2. Take a look at your email verification. Is it working as expected? If not, consider the configuration. If a DKIM, SPF, or DMARC record is not configured appropriately, this may earn you a block.
3. Check the efficiency of your unsubscribe process. A good process will remove subscribers once they request to unsubscribe to your email list. If it doesn’t, there is an issue with the process.
4. Your header information must be complete and accurate too. If there are issues with your header information while sending messages to AT&T, the company may block you. As a rule, your header must show 1 MTA (Mail Transfer Agent) hop or more to avoid the company’s punishment.
5. How do you send a bulk email? If you send bulk emails to AT&T, the channel you use for sending the bulk email matters. If you do so from your home computer, the company may conclude that you are running a spam or phishing email business. That may get you banned.
6. You may want to check your retry settings if you have deliverability issues. If you adjust your settings to allow you to retry sending a message several times, the repeated retries may affect your reputation. The rule of thumb is to reduce the number of retries to 2 or 3 per message. This will allow you to identify the source of the problem faster.
7. Taking the time to try these tips will help you to identify the problem that led to poor deliverability. Once you identify the problem, you shouldn’t have a problem with fixing it.
How To Access Your Email On Att.net
How do you access your mail on att.net? You can choose from the different methods the company supports. Your chosen method will depend on your device type. There are different access options for iPhone, Android, and iPad. Choose the access method you find most suitable from the available options below:
Desktop
- Open your web browser and enter https://www.att.com/. You can do this on different personal computer types such as MAC, PC, or others.
- Click “Sign in.”
- Use your AT&T user ID and email address to sign in.
- Click “Sign In” after providing your login information.
- If you want the browser to store your login details, check “Keep me signed in.” This option allows you to gain access to the email service without entering your login details going forward.
- There is an envelope icon at the top right hand of the page, click it to open your inbox.
Android
- Open the “Settings” icon. It resembles a gear.
- Scroll down until you see “Accounts.” Click it to reveal different account types you are free to add. Depending on the device, this may come in different styles such as “Cloud and Accounts” or “Accounts & Sync.”
- Tap “Add Account” below the account types you wish to add.
- Beside the envelope icon, tap “POP3.” Some devices list it as “Personal POP3.”
- Tap “Manual Setup”
- Enter your email address and password.
- Tap “Manual Setup” again to have access to the setup page of the inbound server.
- Enter your AT&T email login details in the appropriate fields.
- Enter the inbound server address. For AT&T email, the address is inbound.att.net.
- Choose the security type of your choice. Select “SSL/TLS” option from the suggested options.
- Enter the outbound port number in the “Port” field. For AT&T email, the number is 465.
- Check “Require Sign In” box to enable you to check your message anytime.
- Provide your AT&T username and password in the appropriate places. The “Authentication” field will hold the password.
- Click “Save when you are through.”
iPad/iPhone
- Tap the “Settings” icon.
- Tap “Accounts & Passwords.”
- Tap “Add Account” to display a list of accounts you can add.
- Tap “Other” if you wish to add some accounts besides the recommended accounts.
- Tap “Add Mail Account”
- Enter your name in the “New Account field.” This field has different sections for email and password.
- Enter your email address and password in the appropriate boxes.
- In the “Description” field, give your account a description of your choice.
- Tap “Next”
- If you wish to sync your notes and email, select this option.
- Click “Save” when you are through.
These are the available options to access to your email on att.net.
What If You Forget Your Password?
When you create an AT&T account, you created an account with login details. If you forget this password, you will no longer have access to AT & T. You don’t have to panic if you lose your password, you can retrieve it or create a new password. Follow the steps below:
- Visit myAT&T
- Select “Forgot Password.”
- Enter your User ID and Last name for the password retrieval. Enter the retrieval code in the appropriate space.
- Click “Continue” when you are through.
- You will receive a password reset link in your email; click the link to go to the reset page.
- Enter the new password.
- Reconfirm the new password.
- Click “Create” when you are through.
If you forget your User ID and remember your password, you can retrieve your ID. Follow the same process for password retrieval to get your ID back or create a new one. The only difference is: select “Forgot ID” instead of “Forgot Password.”
How To Know If A Receiver Views Your Message
The primary goal of every email marketer is to engage their customers and generate sales. How do you know if your email marketing campaign is a hit or miss if you cannot measure your email engagement rate? The stats matter a lot, they tell you where you need to make tweaks to get better results and take your business to the next level. Att.net allows users to see who views their messages. It offers this service through a third-party application. The read receipts and open tracking form an efficient pair that allows you to know when a recipient opens your emails and reads it. The email provider doesn’t provide this tool through its webmail interface. It only supports IMAP that allows you to use a third party email program that has this feature. This is how to turn on this powerful feature:
- Download a third party with read receipts and open tracking feature. A common tool is Mailspring. You can download this application. Apart from enabling the read receipts, it will also notify you whenever a subscriber opens your emails. The multiplatform application works well on different Windows operating system.
2. Sign into your account: Run the application on your system after downloading. Choose the IMAP/SMTP option from the setup screen. Click “Continue” after you have entered the correct connection settings for your account. The application allows you to bypass the webmail interface and check your emails on your att.net account.
3. Compose and send emails: When you are through with signing in, you can compose messages and send it to your subscribers. While composing the message, go through the list of icons displayed on the message board. Check the link tracking and read receipts icons to enable them. Once you enable these icons, you will receive notifications when subscribers read your messages.
Creating A Follow-Up Reminder On Att.net
Although this is not a part of the traditional features on Att.net, it works with an application that allows users to create reminders. This is to enable you to follow up on messages with no response. Mailspring is the external application that supports this function.
- To create a follow-up reminder, download the Mailspring app and enter the right connection settings as is outlined above.
- Then, look for the “Reminders” icon when you are composing a message in the application.
- Click the icon once you find it. Select a convenient time for the reminder. The several settings options allow you to set a reminder for the next three hours or a couple of days later. Other options include 1 week, 2 weeks, and 1 month. Pick any one that best suits your needs.
- Click the “Send” button when you have completed your message. Once you send the message, the application will schedule a follow-up reminder.
- On the chosen day, Mailspring will display the message as the first message in your inbox if there was no response during the period of time. AT&T offers business owners and email marketers a platform to manage your email delivery.
The email service provider offers you the right tool to optimize your email and improve your email delivery success rate. Additionally, it allows you to track how your subscribers are engaging with your email, so you have an idea of how things are shaping up and what areas you need to improve for better results.
Let’s Get In Touch
Are you ready to talk about this article, and allow us to answer any questions you may have regarding our products or services? MailMonitor would love to chat more with you about this topic, or anything else related to our industry.